
Building a Deck: The Bayside Joinery Way
/It’s hard to believe that 9 months can fly by so quickly. With the help of your donations, we were able to clean up the wreckage at the old shop. I never did post weekly updates of the progress, but now all that remains is the damaged concrete slab where the shop once stood.
In these past 9 months, we have shown ourselves and our community that we are not going anywhere. Working out of my Dad’s old garage, we set up a micro-shop of sorts and have since started and finished several jobs including a kitchen remodel, a screened-in-porch, and a few deck jobs. And that’s what I want to write about today: what makes our decks so different than any other you’ll find out there?
You might take a look at our deck-building process and say that we go out of our way to make it as complicated as possible. There is a certain truth to that, but there is indeed a reason behind the madness. Being a joinery, we like to make sure that wood members join into one another wherever we have a wood-to-wood connection. Take pickets for example. We’ve all seen them...perhaps you will look at the deck of your home and see what I am talking about. Those wooden 1 ½” square, 36” long vertical members that run along the length of the guard rail to keep dogs and children from falling below the railing. We have torn down many decks over the years, and usually pickets are kept fastened into place using nails (not good), screws (better, but still lacking), or the worst of the worst, finish nails. Don’t even get me started on the practice of using finish nails for a connection that is meant to keep children from falling off of a deck.
Over the years, we have seen these twisted, mangled pickets fall apart when faced with a slight tap from a shoe. This is not acceptable.
At Bayside, we take a different approach. Every single railing we build features mortised pickets, which physically connect into the upper and lower rail. No nails or screws to rust away, just a solid wood-to-wood connection that will last as long as the wood does. Not only does this technique provide incredible strength and stiffness to your deck, it also gives your deck that classic timber-frame look and feel.

a basic section of mortised pickets. these particular pickets mortise 1” into the top and bottom guard rails
Whenever someone asks me about our deck building techniques, I tell them to think about Lincon Logs. It’s sort of like assembling a complex 3D puzzle out of parts that you created yourself. As with everything we build, it starts with a 3D model from which we gather all of our measurements. This method is incredibly crucial and integral to our construction process. We then build railing sections, posts, beams, and girts, all of which interlock into one another, and deliver them to the site to be erected.

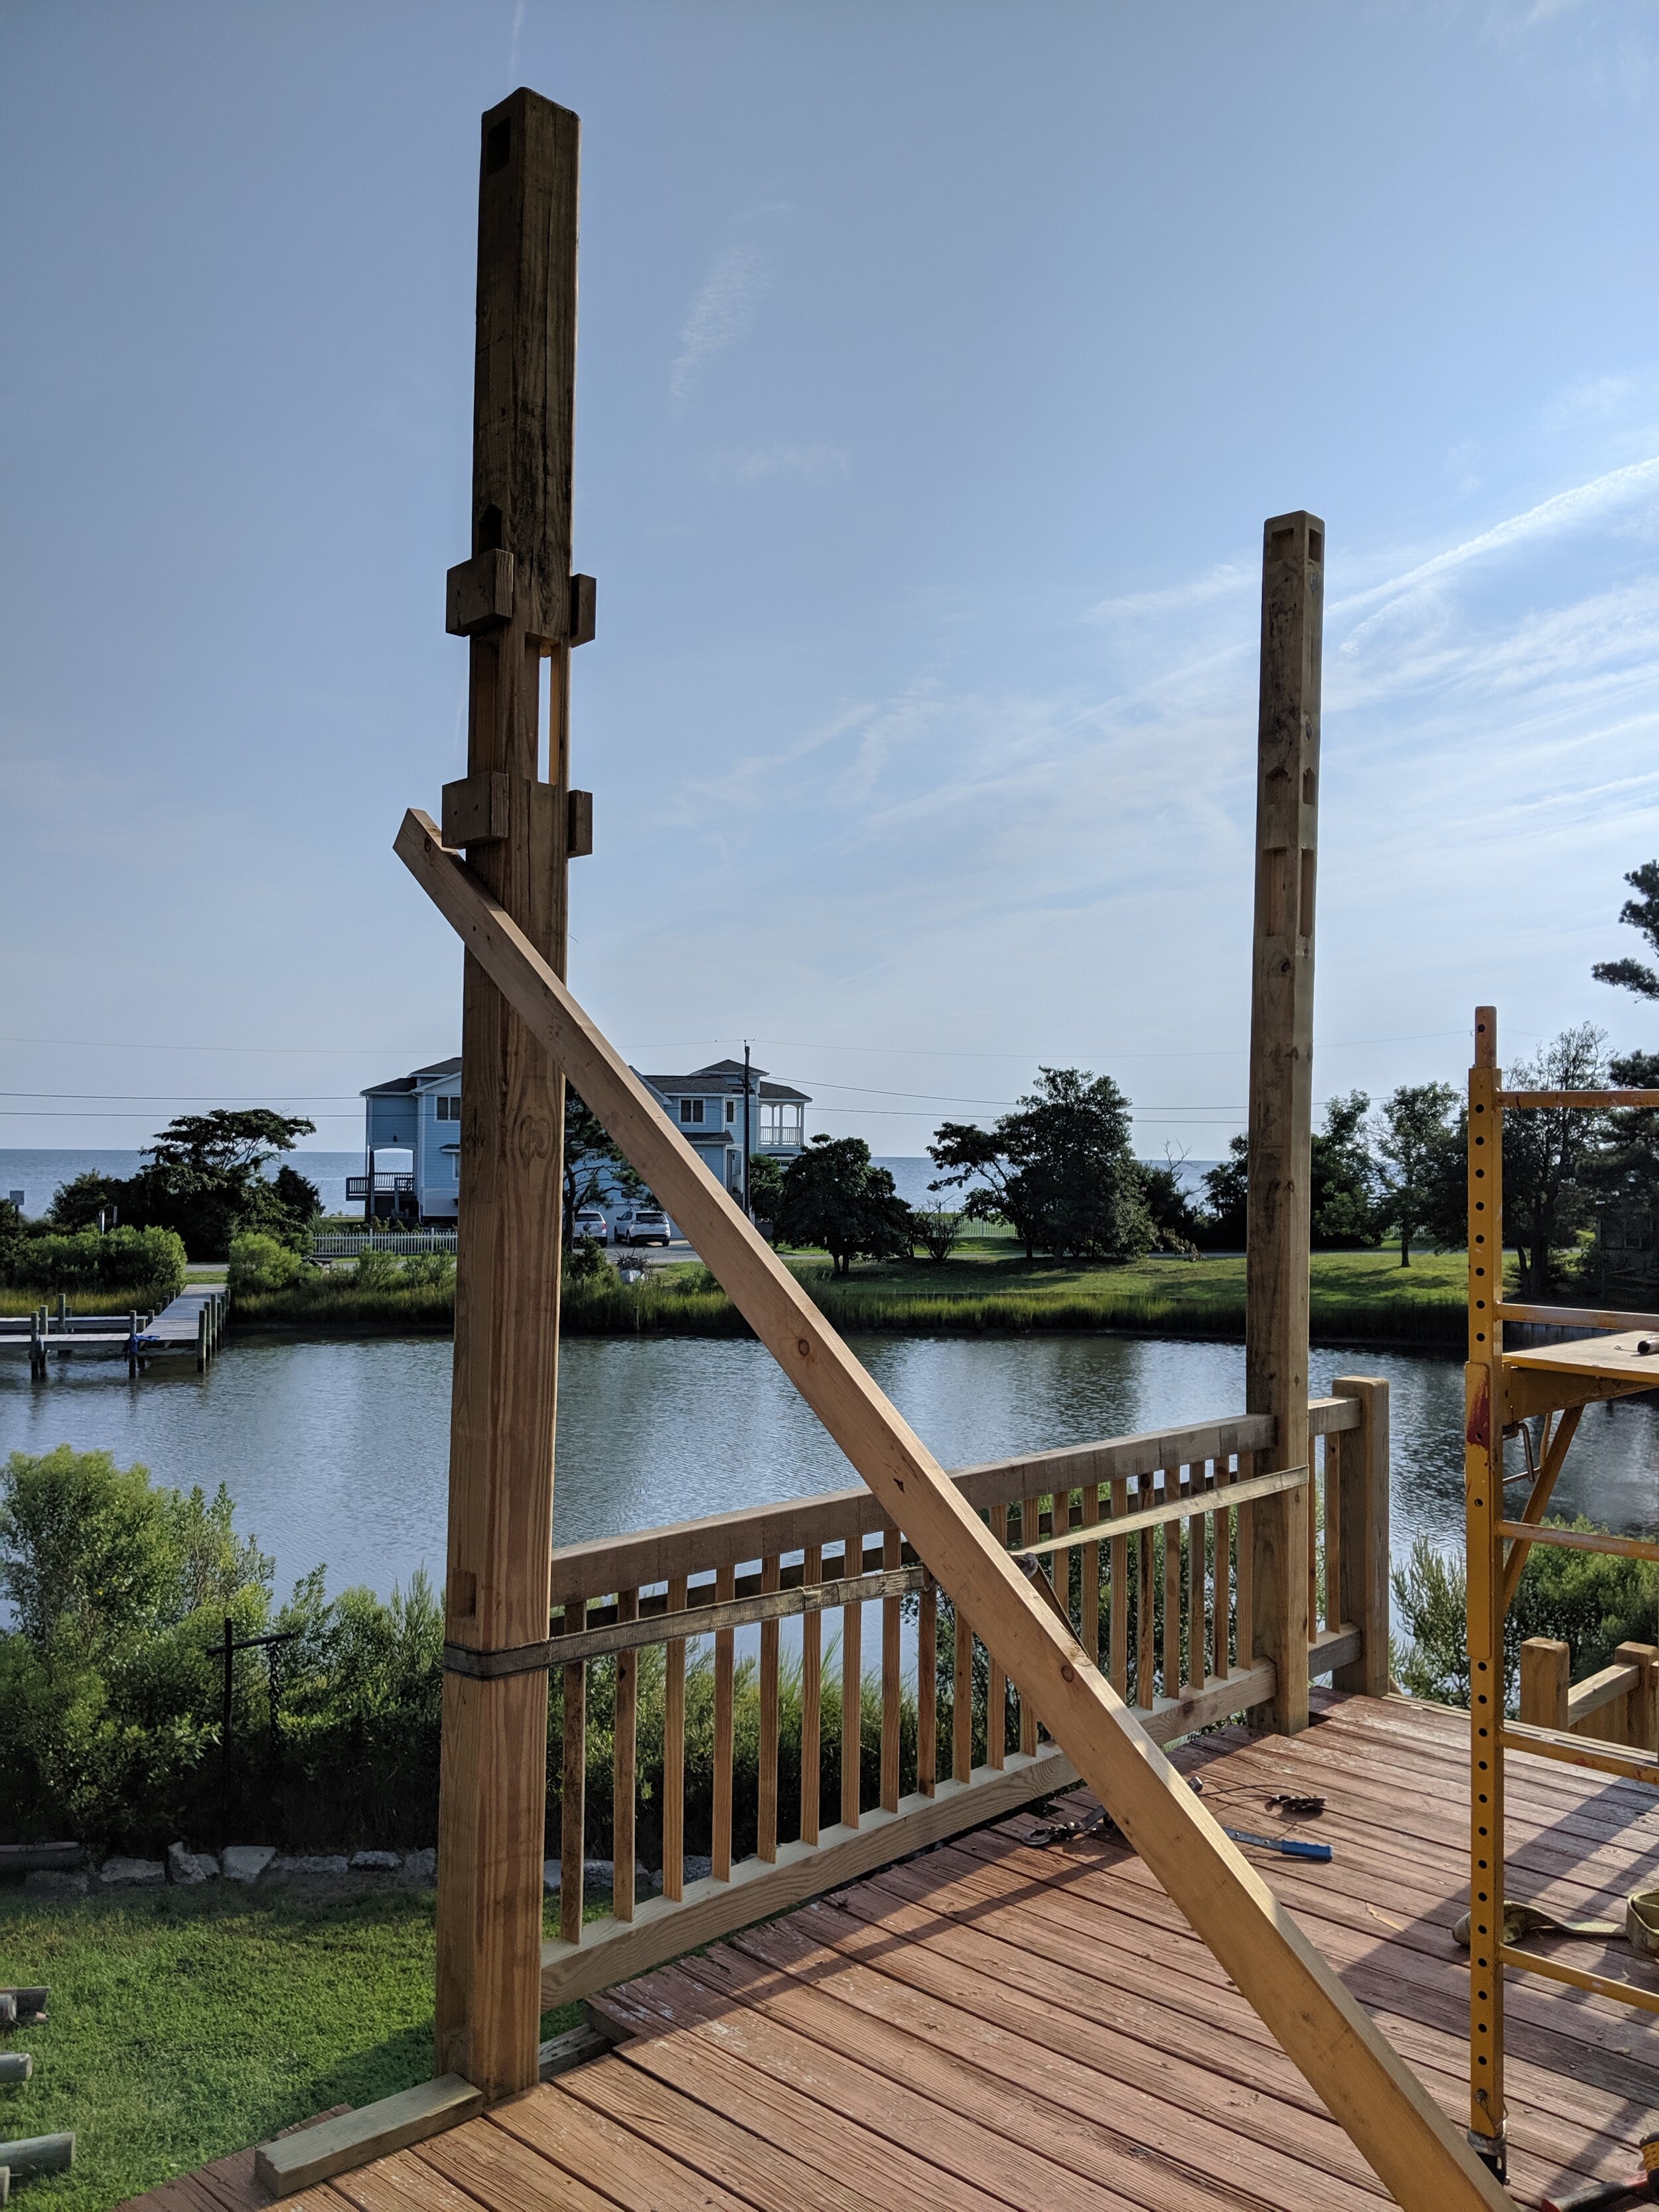
rick holding an “upgraded” version of our railing system featuring rotated pickets mortising into the top and bottom rails. The entire railing section interlocks into corresponding sockets, called mortises. (see post on left side of image) the entire assembly is then installed into place.

a close up of a typical railing-to-post connection featuring rotated pickets. note the slight angle at the top of the bottom rail, which helps shed water off of the railing
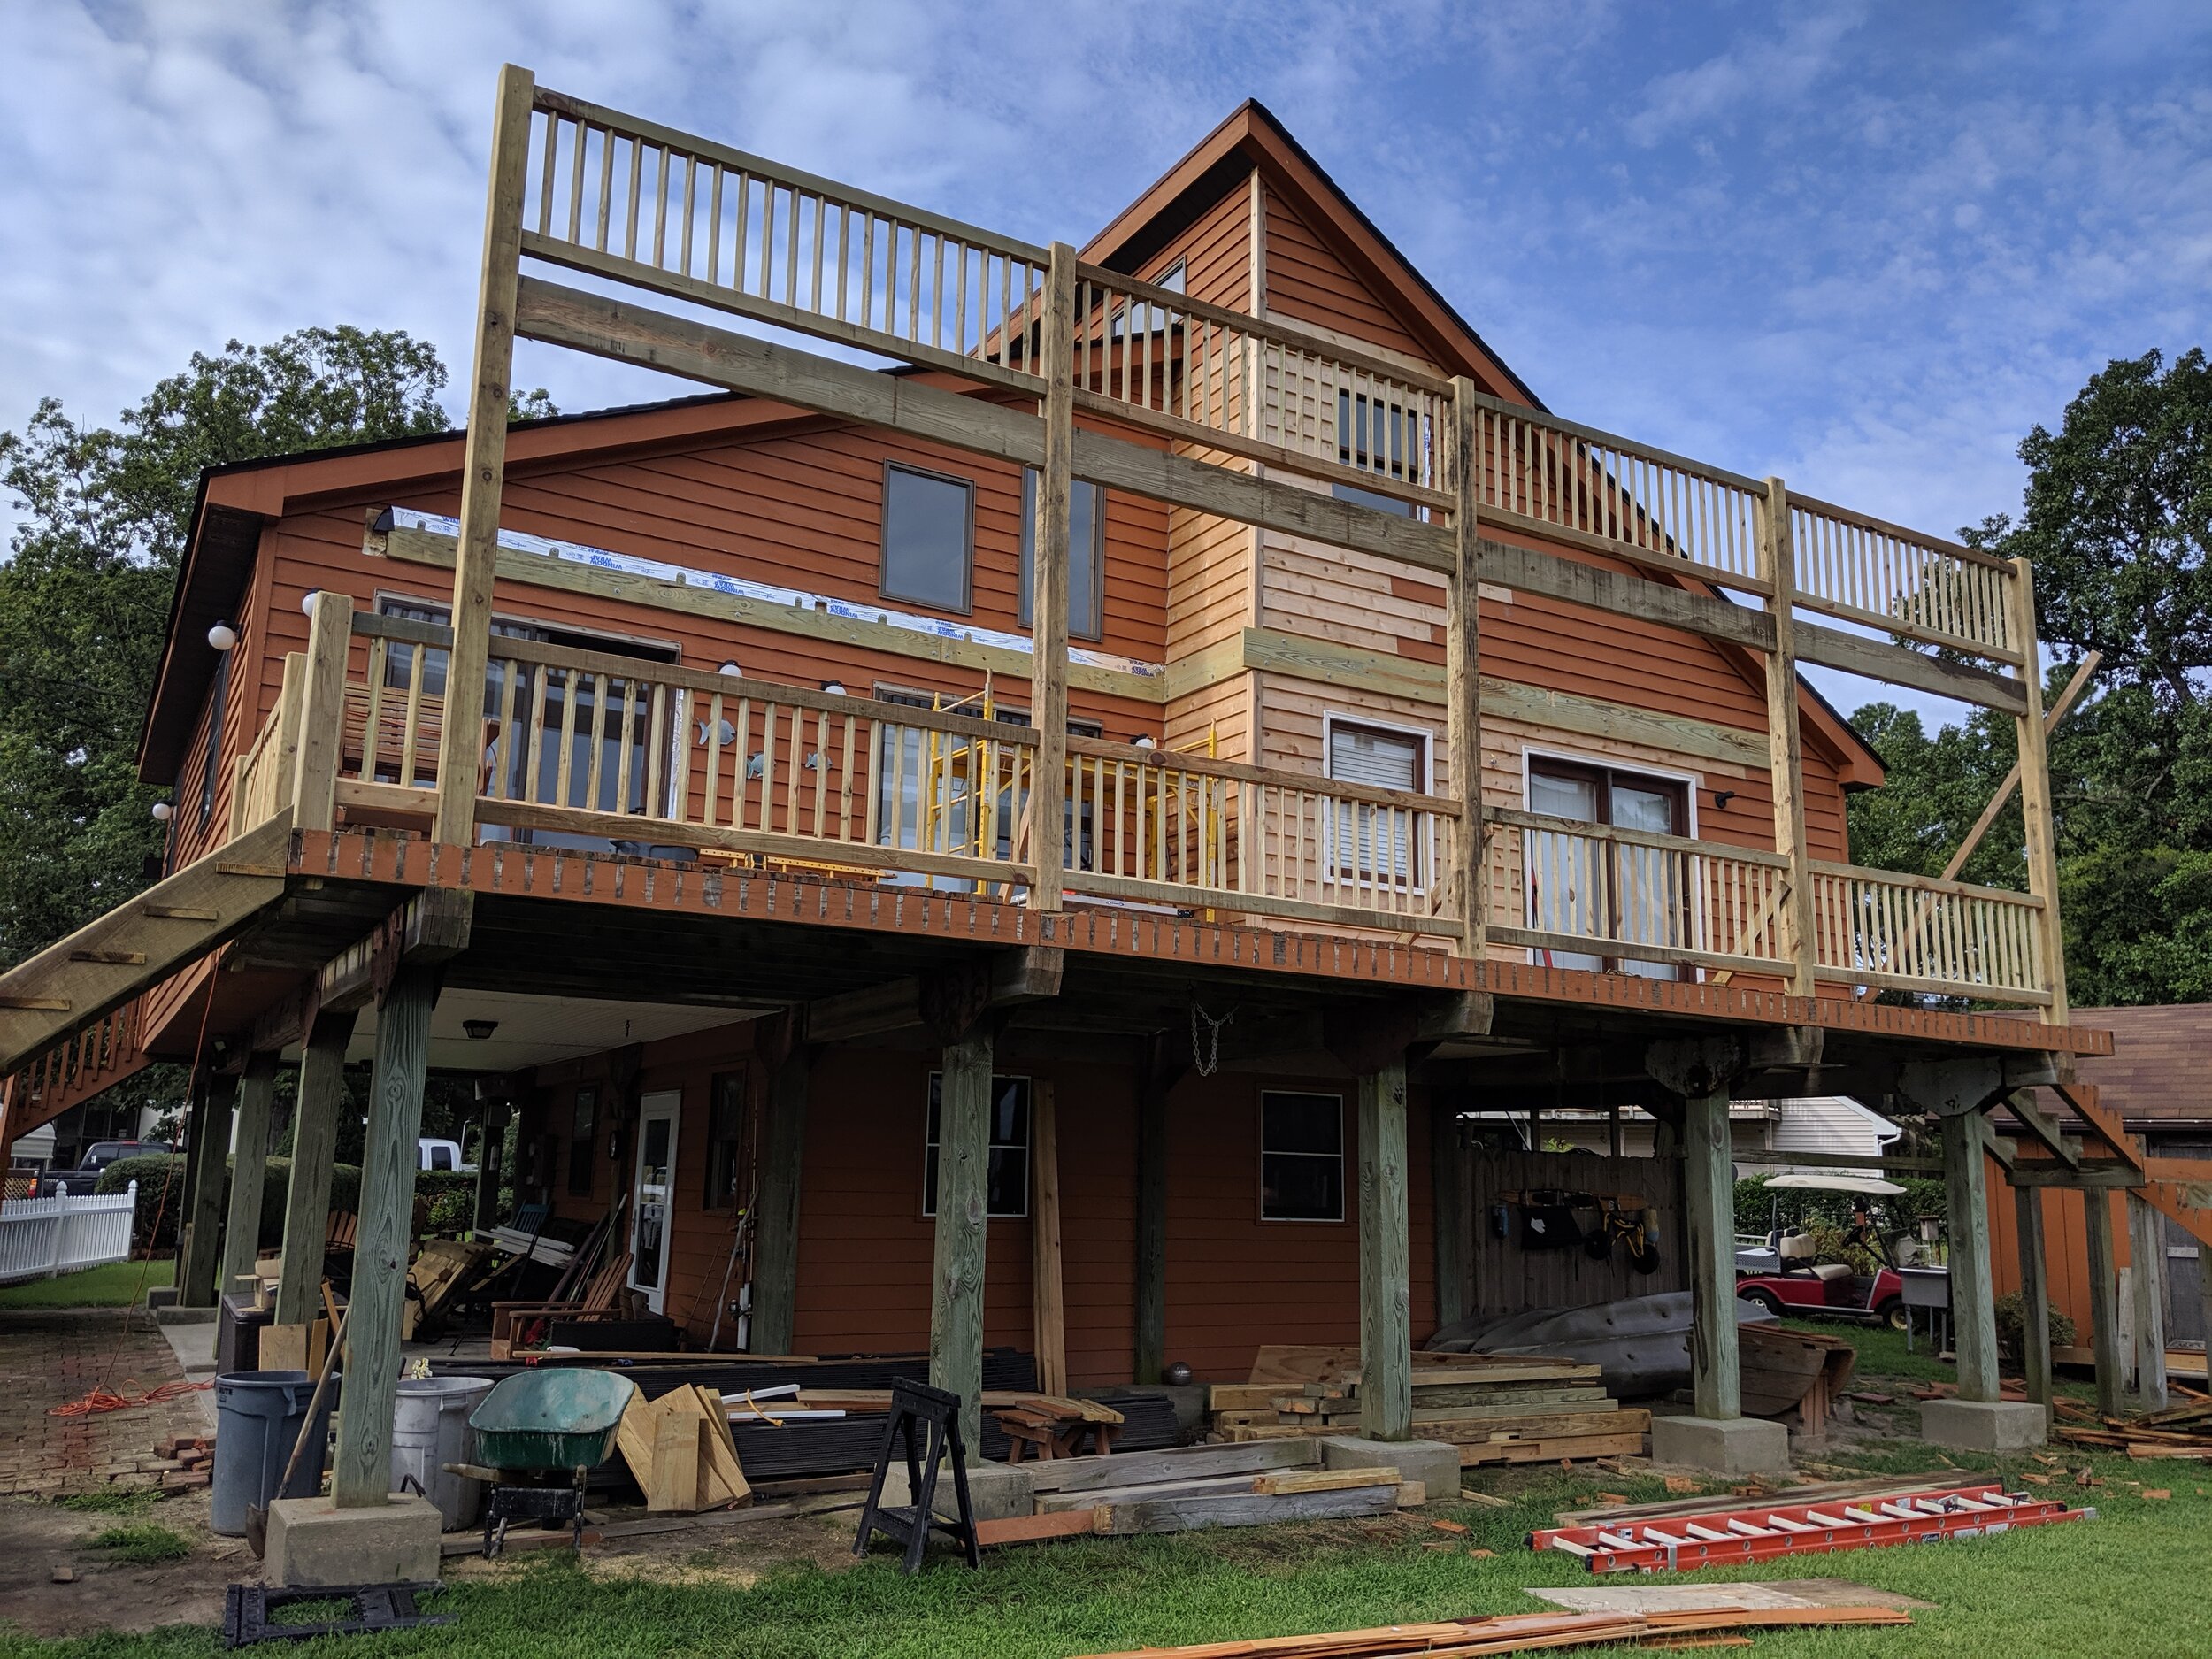
Assembly of these components is by far the most exciting part of the process. Shown below is a project on Gwynn’s Island in which the client wanted to add another level to his existing deck to realize the full potential of his view across the bay, a true “double-decker”. Because these components all lock together, the upper railing and girt must be done at the same time as the lower railing. The posts and railings shown below were assembled by 2 men in one day.


As with any other wooden deck, the treated members will inevitably attempt to twist, crack and shrink as they dry out. However, these interlocking components stand a much better chance of staying in place as we rely on interlocking wood joinery, rather than fasteners, to keep them there.
If you are interested in having your own Bayside Joinery deck, please contact us and we would be happy to work up a quote. Although we specialize in wooden decks, we also work with metal, composite decking, and other materials that may suit your deck better.
More images of this job will be posted on our Decks page once it is complete!


